Looking for bespoke built-in cabinets, but your budget or carpentry skills won’t quite stretch?
Here’s an IKEA hack using the METOD kitchen cabinets that gave The Brixton Home Boys the seamless look they were after, in just a weekend!
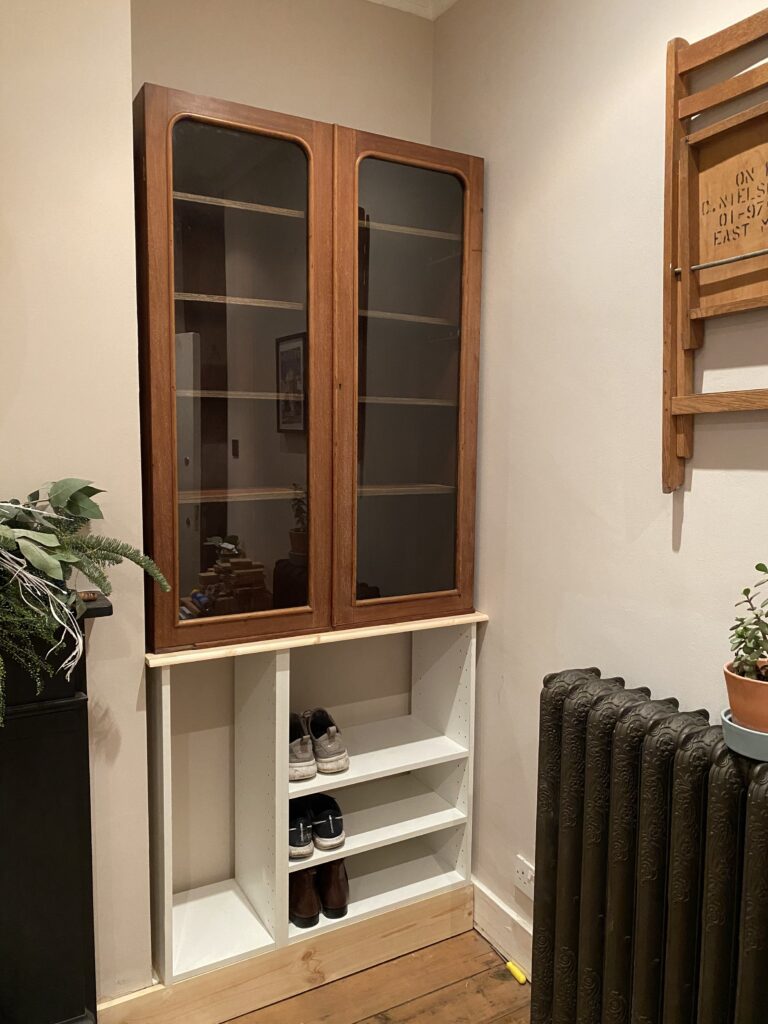
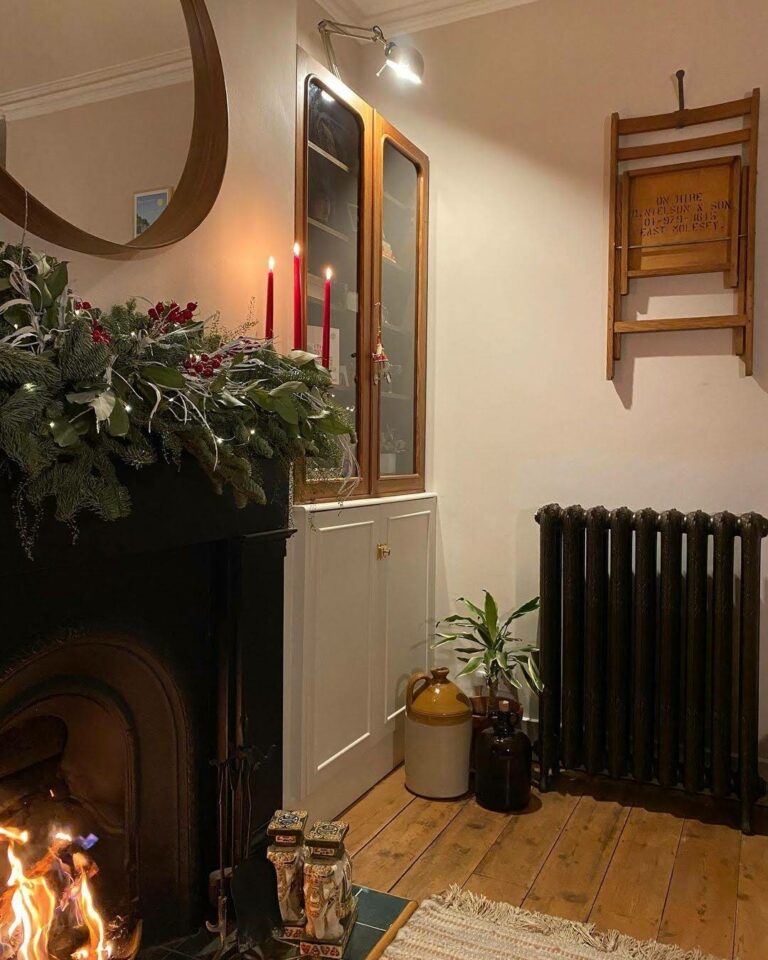
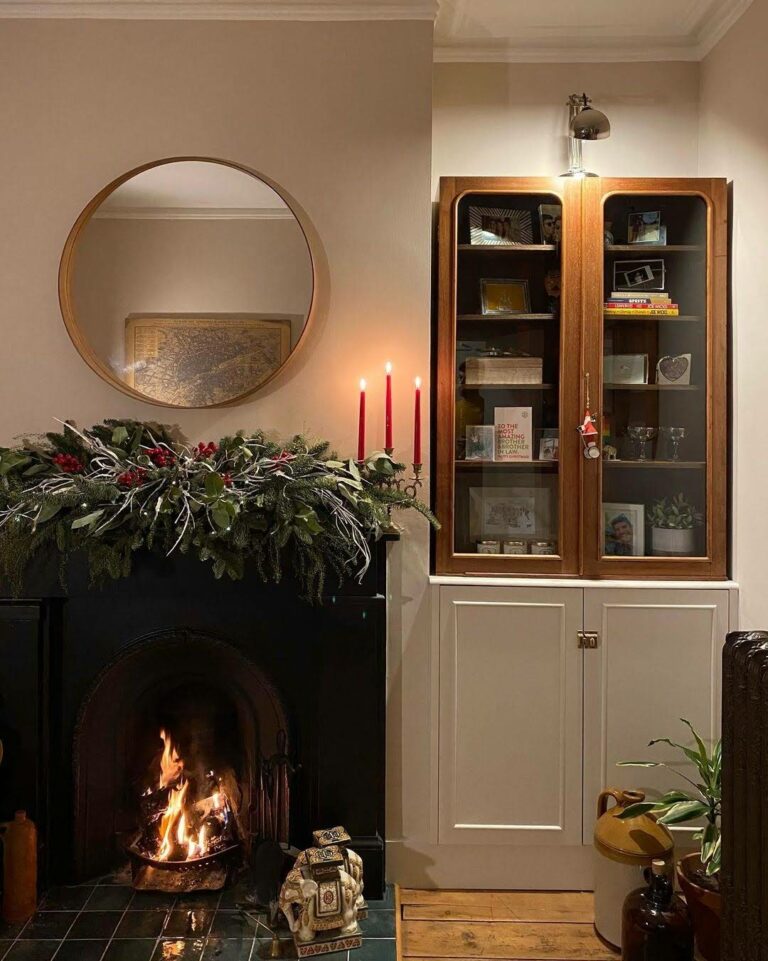
Instagram and Pinterest help provide so much inspiration that can help you narrow down the aesthetic you’re looking to achieve. For us our inspiration came from the top half of the cabinet after picking it up on Facebook Marketplace – it fit like a glove in our alcove, and because we knew we needed more storage (mainly for shoes!) we decided to have a go at building in the base units ourselves.
STEP 2: The Measurements
"Measure twice... order and cut once"
When measuring the space that the cupboard will fit into, you will need to take the following into consideration:
The overall width of the alcove
The finished height of the cupboard – i.e will it just be the base unit, or a full height cabinet
The depth of the alcove*
*as we were planning to use ours for shoe storage, this was a key measurement for us as we needed to make sure that we’d be able to close the cabinet doors once the shoes were in – so we measured the length of the shoes!
The METOD base cabinets come in the following sizes, so you will need to be mindful of this when calculating your finished width: 20cm, 30cm, 40cm, 60cm and 80cm.
Our alcove measured 93cm, so we opted for a 30cm and a 60cm cabinet. As we wanted to achieve symmetry with the glass cabinet going above, we chose to use two 45cm doors knowing that the cabinets behind wouldn’t show once the doors were on, rather than three 30cm cabinets.
STEP 3: Customisation
The depth of the METOD base cabinets are either 37cm or 60cm, so you may need to trim these down depending on the depth of your alcove, and whether you want it to finish flush with the wall, or project out slightly. We chose to trim ours back to 34cm using a circular saw. If you need to trim the units back, do this before you build them, and trim the back edge of each piece so that the front edge remains intact, as this is the edge you will see when you open the doors. Do the same for any shelves you will also be using inside the cupboard.
STEP 4: The Build
"Work with existing features such as skirting or edging and make sure you accounted for this in your measurement"
Build the base cabinets based on the IKEA instructions, and if you’re combining more than one unit together, screw them to each other . . . you can use the pre-drilled holes where the shelf brackets go to keep it simple.
To achieve a truly integrated look you should consider raising the units so that they will sit above the skirting boards. In our example, we removed the small piece of existing skirting board and replaced it with a new piece that ran the full length of the base units. The base units can then sit on top of the new skirting – you might need to add some additional framing around the back and sides to support the base units depending on the size of your alcove.
STEP 5: Adding Trims
"Use trims to hide any gaps either side of your unit for a truly built-in look"
To help achieve the fully integrated look, you may need to add some timber trims to each side of the cabinet, depending on the width of your alcove vs. the base units – you can see in our example that we added two lengths of wood to each side, and made sure that they stood proud of the units so that once the doors were hung it creates a flush finish. Don’t forget to run a small bead of decorators caulk around the edges where the timber (or units) meets the walls/edges so that you don’t have any visible gaps, and provides a seamless look.
Depending on your design, you may need to add a counter top to the base cabinets, for example if you’re going to use it for your TV. For ours, as we were adding the glass cabinet on top, we decided to add some decorative timber moulding to create the illusion of a slim counter top. Similarly, if you are going to add go for a full height cabinet, you might want to consider doing the same and setting the top cabinets back by an inch, and adding glass doors.
STEP 6: Door Styles
"Don't be limited on the cupboard style- go plain and trim it up"
The METOD cabinets come in a wide variety of styles, from traditional to more modern, but if there isn’t a style that quite matches what you’re looking for, you might want to consider customising their plain style doors with mouldings.
We wanted to mirror the moulding detail of the glass cabinet which sits above the base units, so we bought some half round moulding, cut it to size using a handsaw and mitre block, and attached to the VEDDINGE plain doors with grab adhesive and nails – again, use a small bead of decorators caulk where the trim meets the door so that you can’t see the join.
Next, prime the doors using a multi-surface primer before applying a couple of coats of eggshell (or your preferred finish). We used the same primer and top-coat for the timber trims around the unit, and continued it on to the skirting boards for a seamless look (it’s also the same colour as the walls!).
"Bring your unit to life with finishing touches which compliment your style"
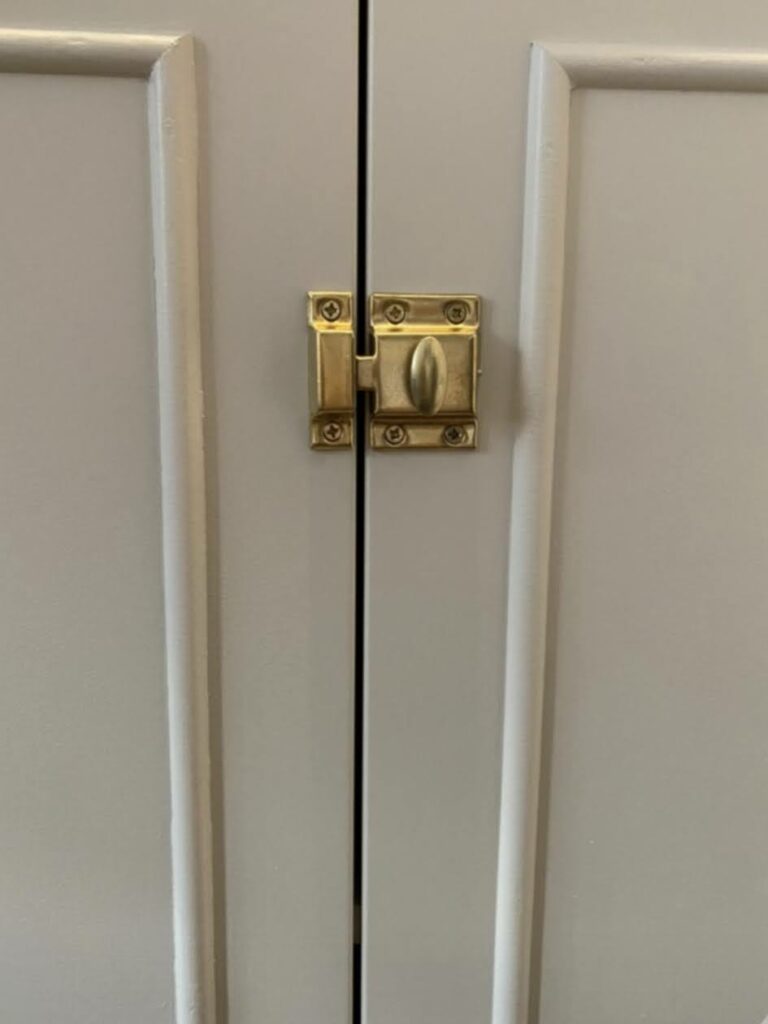
With the doors hung and in place, it’s time to add the handles. Again, this is a great opportunity to think about the overall finish you’re looking to achieve with the style of handles you choose. To tie the base units in with the style of our glass cabinet, we chose a simple brass latch.


")