


We did a lot of research to make sure that our tiles had the best chance of staying secure on the wall and so that the shower itself remained watertight. As we were creating a shower in a period property it was inevitable that the walls were neither straight, nor flat across the facing surface; so to counter this we created stud walls to give the best tilting surface possible.
When researching, the most common point that repeatedly kept coming up was to ensure your shower had been suitably waterproofed with a shower tanking kit because no tile grout is fully waterproof on its own.
There are several available on the market and the vast majority will cover a standard walk in sized shower cubicle; we used a tanking kit and it was enough to cover our two shower walls (0.8m wide x 2.2m high and 1.40m wide x 2.2m high). The kit came with a plaster primer, which is applied first and can be used on plasterboard or direct to plaster, a jointing tape to go over any of your plasterboard joints and edges. The kit also included the tanking membrane itself which is applied over the top using a paint roller to create a watertight space suitable for tiling on top of.
The tanking kit comes like paint and is easily applied but dries like plastic. Because of this, it’s best to make sure you don’t leave any big drips in it when applying.
- Check the thickness of the tiles you want to use, especially if installing a concealed shower valve as there are minimum and maximum depths the valve can protrude from the wall under the tiles.
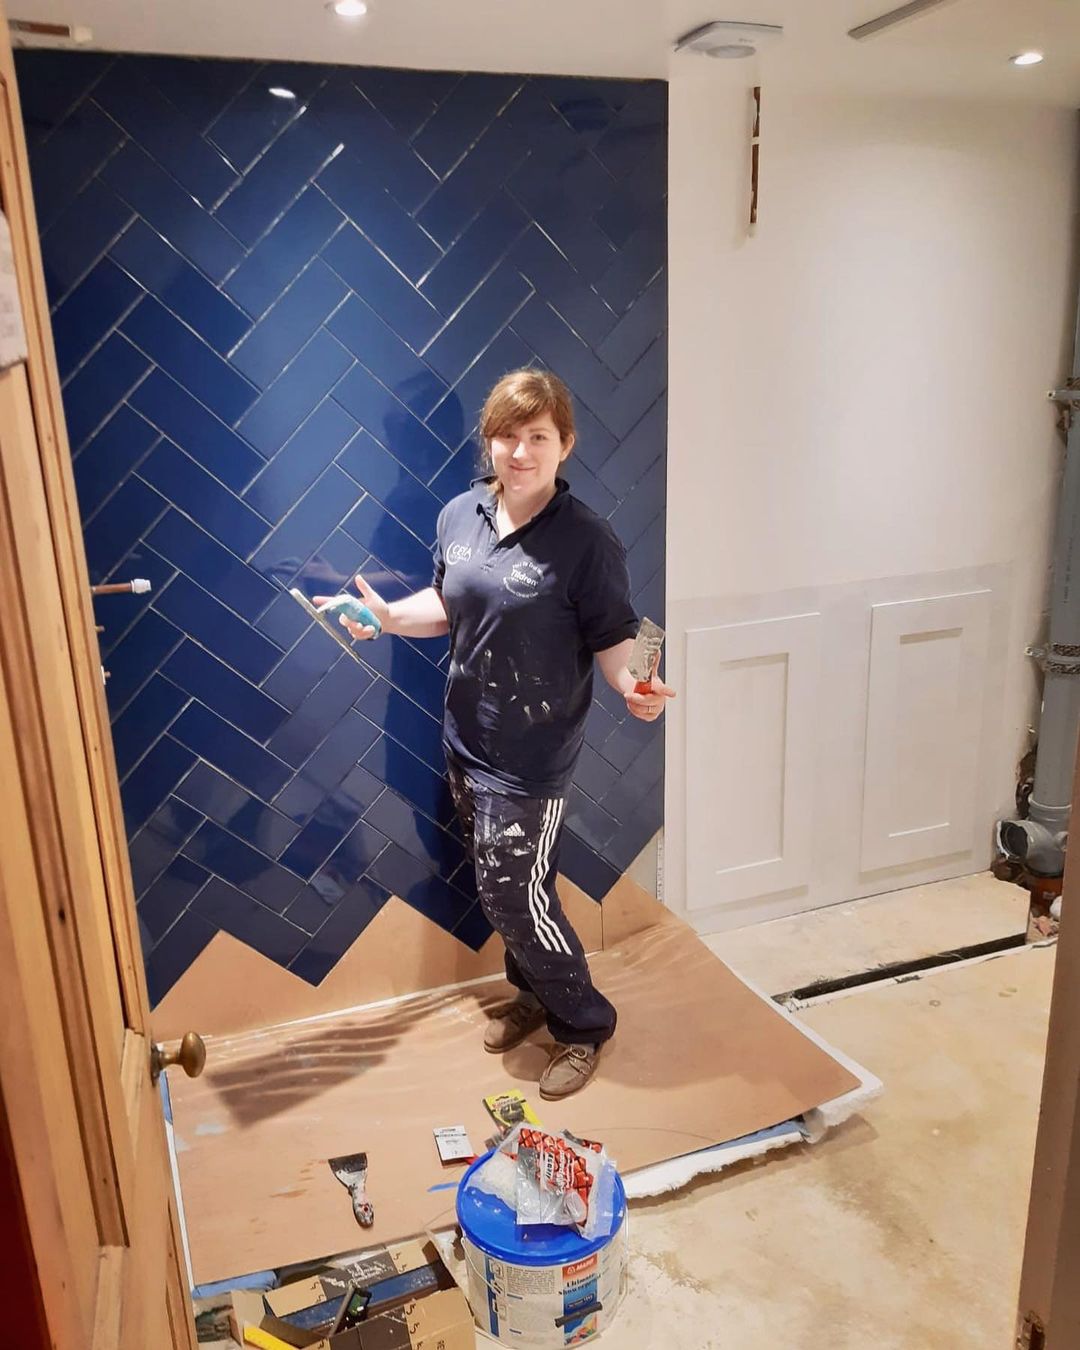
- As the herringbone pattern involves significantly more cuts than other styles; we invested in an electric tile cutter with a diamond edged blade to minimise chipping and wastage, but we have seen other people use traditional tube style manual cutters, bench mounted cutters and angle grinders.
- We purchased a 45 degree square to make sure we were lining up the tiles at the right angle (especially when we first started!) and laid out a few dry cut tiles on a cardboard template on the floor to make sure we were happy with the pattern and tile spacers (we used 2mm spacers).
- We also used a sheet of MDF to make a template jig to support the lower levels of tiles while the adhesive started to bond to the wall to avoid them slipping down out of place; we did a lot of research before we started thinking about herringbone patterns, and some tilers recommended the use of a jig, whereas others didn’t. We just assumed we needed all the help we could get!

Equip yourself with all the right tools before you start to give yourself the best chance of success. You will need:
Waterproof tile adhesive which comes either in a pre-mixed, ready to use tub, or as a bag you make up with water.
A notched adhesive tile trowel- we used a 4mm like this Steel one but check your adhesive and tile specifications for the best size)
Tile spacers- Some such as these TOPWAY tile levellers act as spacers as well as levellers which will make sure you finish with a nice flat wall
A trowel to place the adhesive onto the walls.
A grout float
Some tilers advocate measuring the width of your first wall and finding the midpoint and laying the point of the first herringbone tile on this to start your pattern. Others recommend starting from the corner where the two walls meet and working outwards one wall at a time. We opted for the latter option as we wanted to minimise the number of smaller triangles in the joining corner as this is one of the potential weak spots in any shower cubicle. However, this may come down to personal preference. Each tile is laid 45 degrees to the last to create the “zig-zag” herringbone effect.
Measure (twice!) each tile you need to make a cut on to ensure it will fit; we did this with each tile as we came to it. Apply the bed of adhesive and run the notched trowel through to lightly score in the grooves which bond to the back of the tile. Lay your tile into space and apply light pressure, but don’t crush the adhesive. Wipe away any excess adhesive as you go as it’s very hard to remove once it’s dried. If you are using tile trims, make sure these are firmly fixed in place to the edge of your tiling doesn’t start to drift. You can check this with a laser level to keep you on track.
At the point where the two walls join at the corner, lay a small bead of sanitary silicone along where the tiles will sit against each other to give an extra layer of protection from any moisture. At the point where you are ready to grout, it is recommended that you apply a bead of silicone over the top of the tiles down the corner line (you can get colour matched silicone to match your grout, so you wouldn’t notice a difference). Silicone is used rather than grout due to its flexible properties in case of any slight movement, which might over time, cause your grout to crack.
A lot of the off cuts from the tiles can be used as infills for the triangular shaped gaps left when you get near the floor and ceiling, which can reduce wastage. Standard tile patterns advise between 5 and 10% extra purchased for wastage and breakages, but as the herringbone requires more cuts, we ordered 15% extra. If you need to make circular cuts either straight through the tile to accommodate a pipe outlet, or around a valve, you can use an angle grinder or diamond tipped core drill bit.
It is recommended to remove your tile spacers 20-30 minutes after you have inserted them; we removed a few that we forgot up to an hour later without issue. Don’t forget about them overnight as it might be challenging to remove them the next day!

Once your tiling is complete and your adhesive is holding them firmly in place, you are ready to grout. Select an appropriate waterproof, flexible grout for your tiles and mix up according to the manufacturer’s instructions. Apply the grout with the grout float at 45 degrees to the tile joins; with herringbone this normally means you end up moving the float straight up and down over the tiles, to ensure all the open joins are filled evenly. Wait the recommended time to let the grout start to cure and check for any air bubbles before starting the washing off process.


