
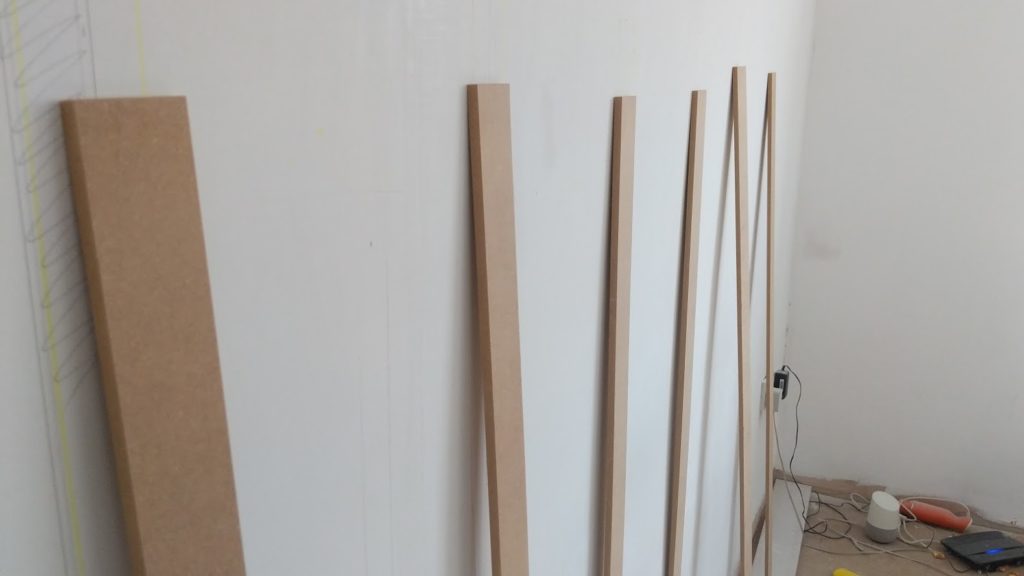
Wall panelling can be a great way you achieve a fabulous new style on a small budget, so if you're wondering how to achieve this look, have a read of our step by step guide and use our panelling calculator to help you. Panelling really is as easy as you hope it is and with a standard wall costing less than £70, it will give you that fabulous feature wall without breaking the bank!


Comments
Nice post. I was checking constantly this blog and I’m impressed! Extremely useful info specifically the last part 🙂 I care for such info much. I was looking for this certain info for a very long time. Thank you and best of luck.
Great post thank you. Thinking of doing this in our hallway. What do you do if there is a section of wall that is smaller than the size of the spacing you have used everywhere else, as it will look odd won’t it as the spacing would be smaller 🤔.
Author
It’s hard without seeing the plans or the room but I would treat the wall as a continuation of the wall it follows on from if you can? If not, maybe consider making the width of your gaps the same width as the small wall so you can start and end the wall with a batten?
Hi
I have my wall sizes but I am no good with numbers is there any way you could help me work this out
Thank you Anthony
Author
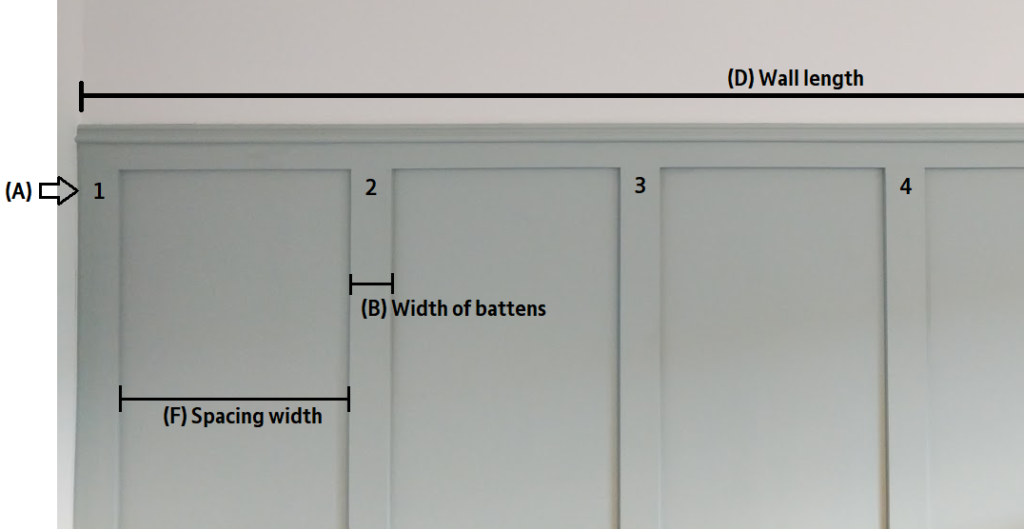
Sure, do you know roughly how many battens you would like across the wall?
Hey, looks great, what thickness did you go for on the batons? I’m thinking 9mm.
Thanks, D
Author
Yes mine are 9mm too :). And thank you!
what width did you use for each baton – thank you
Author
Hi, I used 60mm
Pretty! This has been an extremely wonderful post. Many thanks for providing this information. Avis Lay Joshia
Hi! Thank you for posting this calculator. I found you through Google and you’ve saved my brain
Hi, found you through another website and this calculator is fantastic!
We are currently trying to improve our wall panelling service so it’s wonderful to hear your experience
Pingback: How to: DIY Wall Panelling - House of Spolland
For the middle Barton’s that were 40mm , are they cut the length of the gap between the 60mm batons ? Would that be correct ? Or do you run a long 40mm baton across the entire top and bottom & then have the 60mm batons shorter to fit in the space ? I’m thinking now the 2nd one I’ve wrote but not certain ?
How many panels would I need the measurements of panels are 915x516mm . I need 5 and half meters
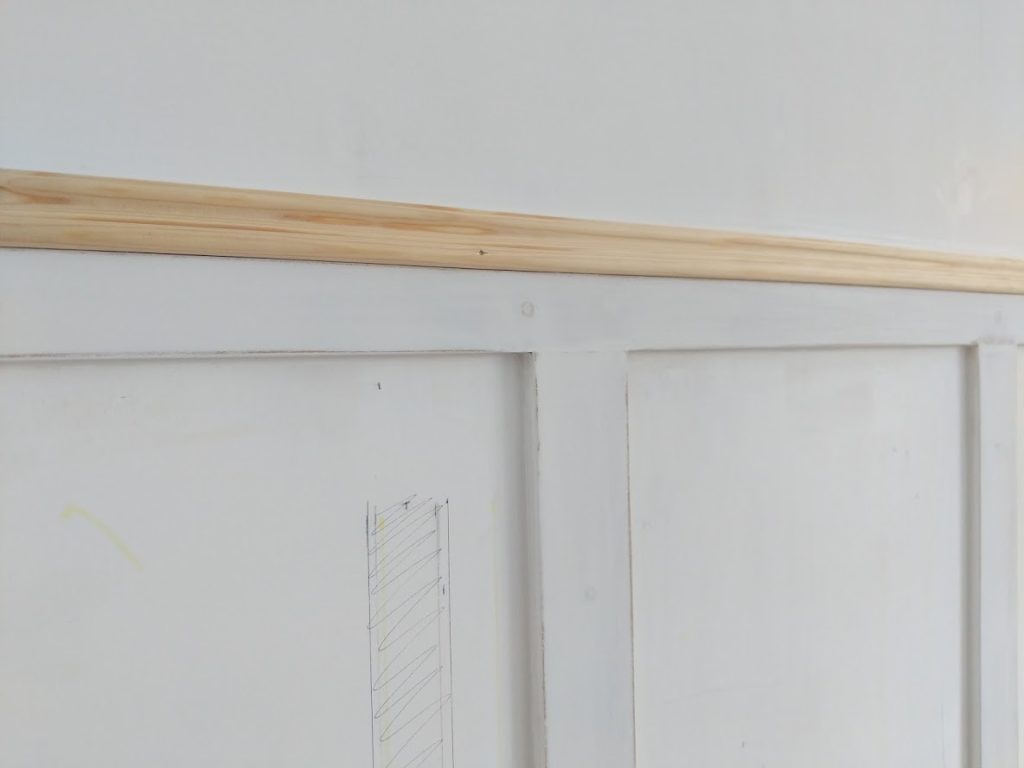
At what point/step did you add the top horizontal strip? After adding the vertical strips?
Hi,
Do you have any pics of this from the bottom showing how it sits along the skirting board? I already have skirting boards put in that are around 10cm high, not sure if best to remove them or just panel above them!
Thank you for the great information and news. I like your blog very much, I added it to my follow list.
Hi Hannah,
Read most of your destruction’s and the calculator bit is brilliant 🙂
Reading the finishing bits about paint and rubbing down etc… 2 coats of primer / sand between … then we go straight to top coat or gloss… Why no undercoat zx2 and sand?
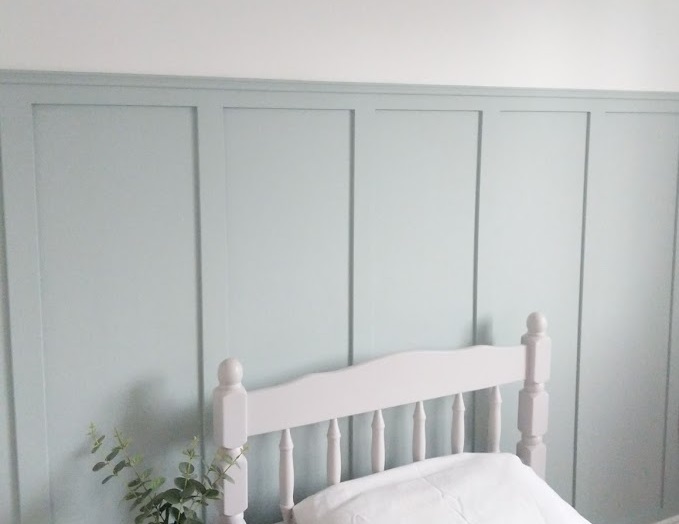
I did it! I’ve been hating on my bedroom for ages. I couldn’t get any type of uniformity and it was getting grubby and uninviting. I wanted wall panelling and my sister and I decided one evening to do it in our respective bedrooms. Measured up, went to B&Q and got everything needed. The only thing I would change is caulk for polyfilla as it is easier to work with and can be sanded down.
My bedroom looks absolutely awesome now and I am I love with it. That I did the whole thing on my own makes it even better!
About to panel my hallway and stairs and spare toilet.
Thank you!